Nile Cloud Radius Integration with Entra ID SCIM
7 min
What is SCIM?
- SCIM stands for System for Cross-domain Identity Management
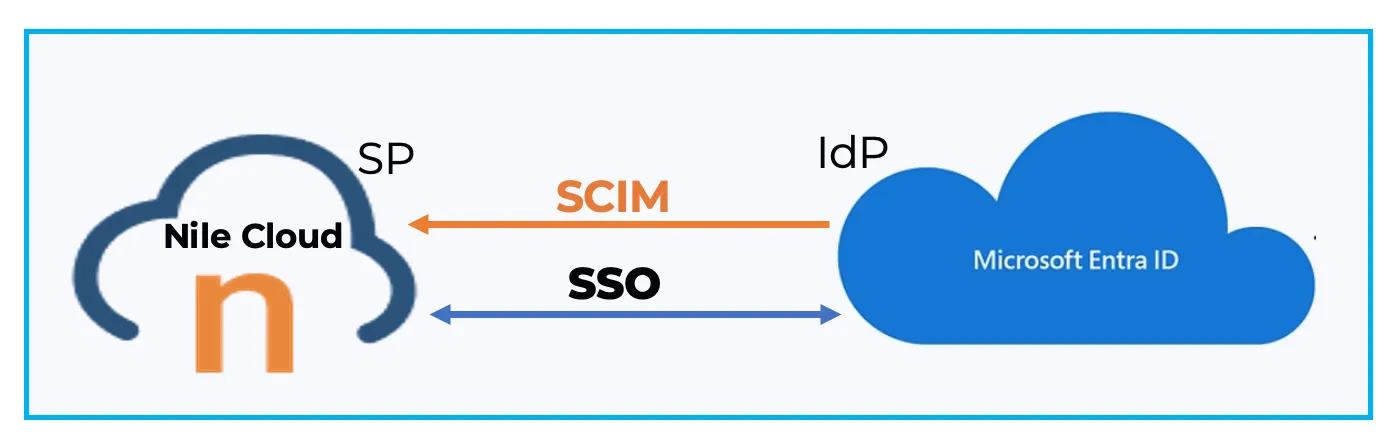
- It consists of a REST/JSON-based protocol to simplify user identity management between Identity Providers (IdP) and cloud-based Service Providers (SP)
- An IdP that supports SCIM (Azure, Okta, ..) acts as a SCIM client and sends identity information and changes to the SP (Nile) acting as a SCIM server
Requirements
- Entra ID user with application admin role to create enterprise applications
- Administrator access to the Nile Control Center (Nile Portal)
Configuration
The integration of Cloud Radius with Entra ID SCIM consists of the following tasks:
- Generate a SCIM API key on the Nile Control Center IdP page
- Create an Enterprise application in Entra ID and provision it for SCIM
- Assign users/groups to the application
- Enable the provisioning to trigger the Entra ID sync
Nile SCIM API Key
- Log in to the Nile Control Center https://www.nile-global.cloud with Administrator rights
- Navigate to GLOBAL SETTINGS > Identity to view the IDP page
- Click on ADD A NEW PROVIDER to create a new IdP SAML provider as per the Nile IdP Integration documents
Note: Currently, the SCIM configuration is available once an IdP provider has been created
- Under the SCIM Configuration section, click the ADD SCIM KEY button to generate a SCIM key
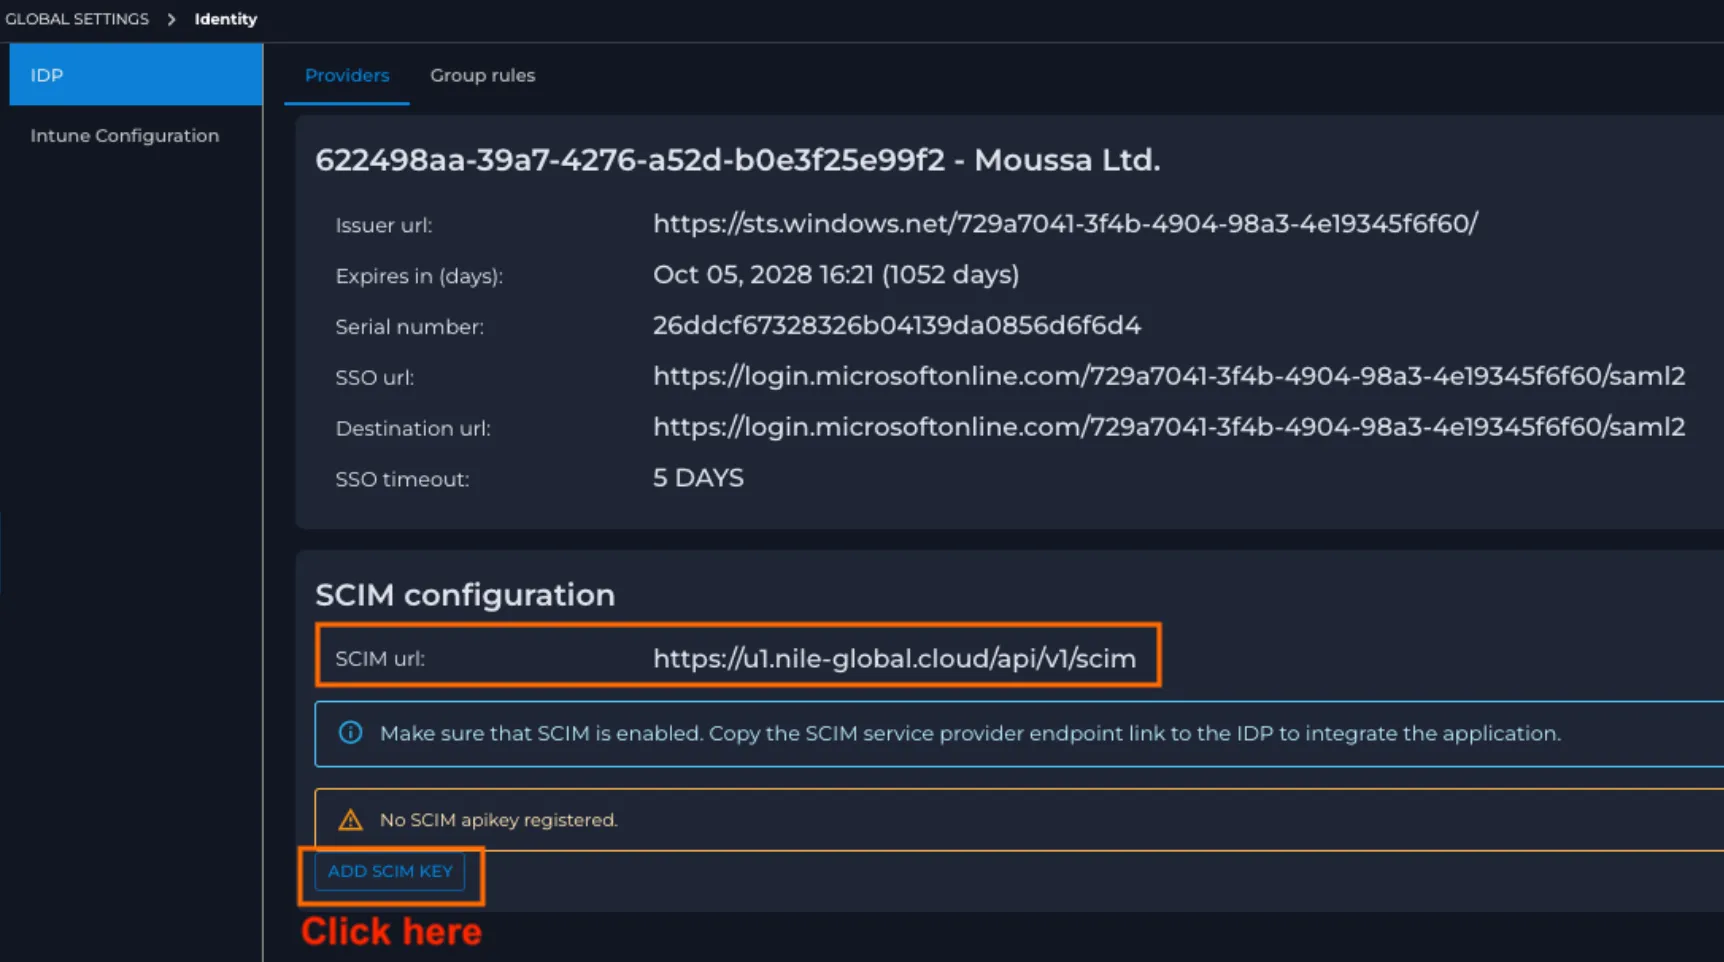
- A .json file (scim_api_key-xxxxxxxxxxxxxx.json) containing the SCIM API key is created, and the admin is prompted to save it on his/her local computer

Entra ID SCIM provisioning
- Sign in to the Microsoft Entra ID portal: https://entra.microsoft.com
- In the left pane, expand the Entra ID menu option, and click "Enterprise apps"
- The Admin has the option of using an existing Enterprise SAML app with Nile, if configured, or creating a new application by clicking on + New Application above the application list
- If creating a new app, click on + Create your own application in the App Gallery
- Enter a name and click the CREATE button
- From here, the same steps are followed when using an existing SAML app. Under the Manage menu, click Provisioning
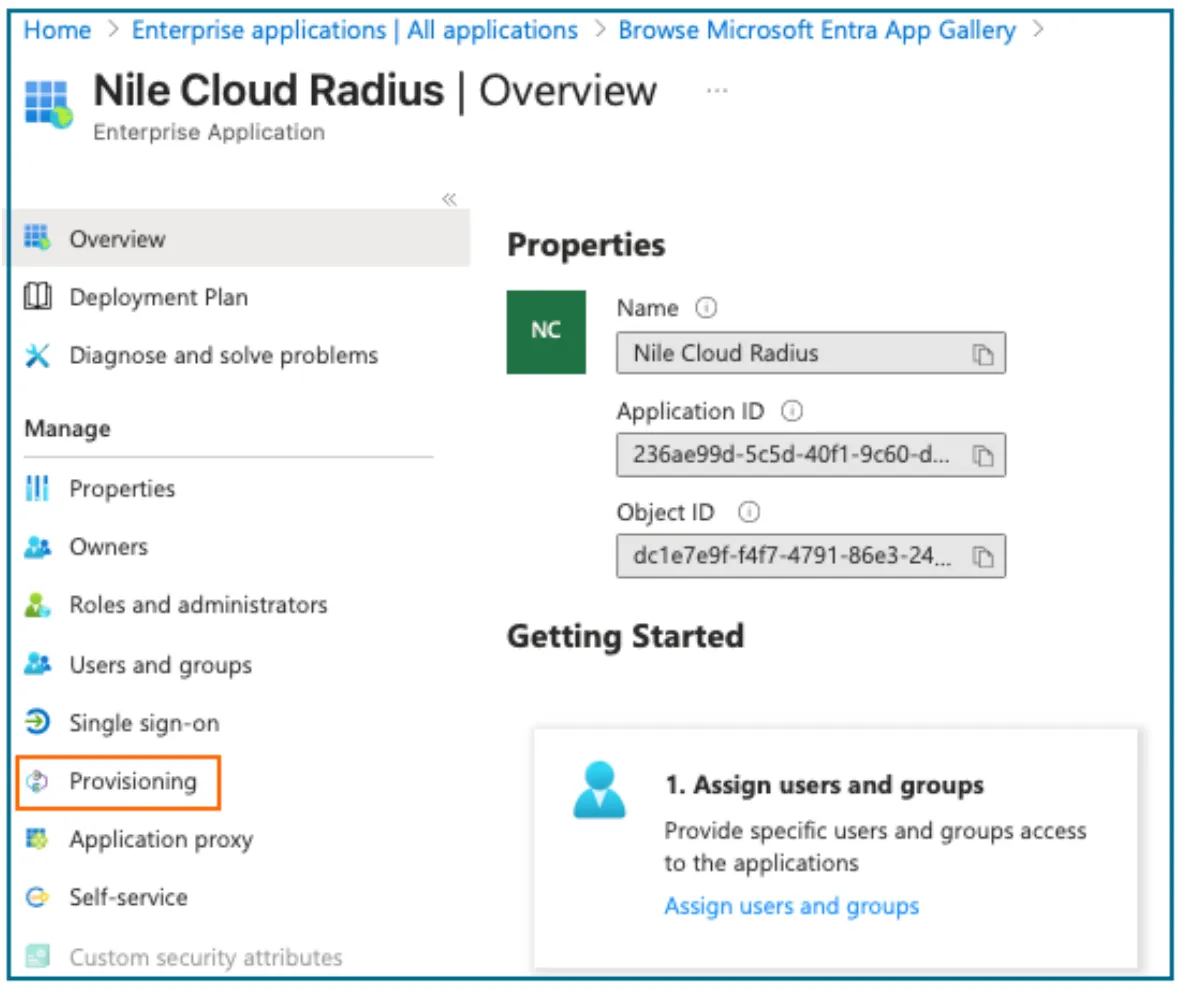
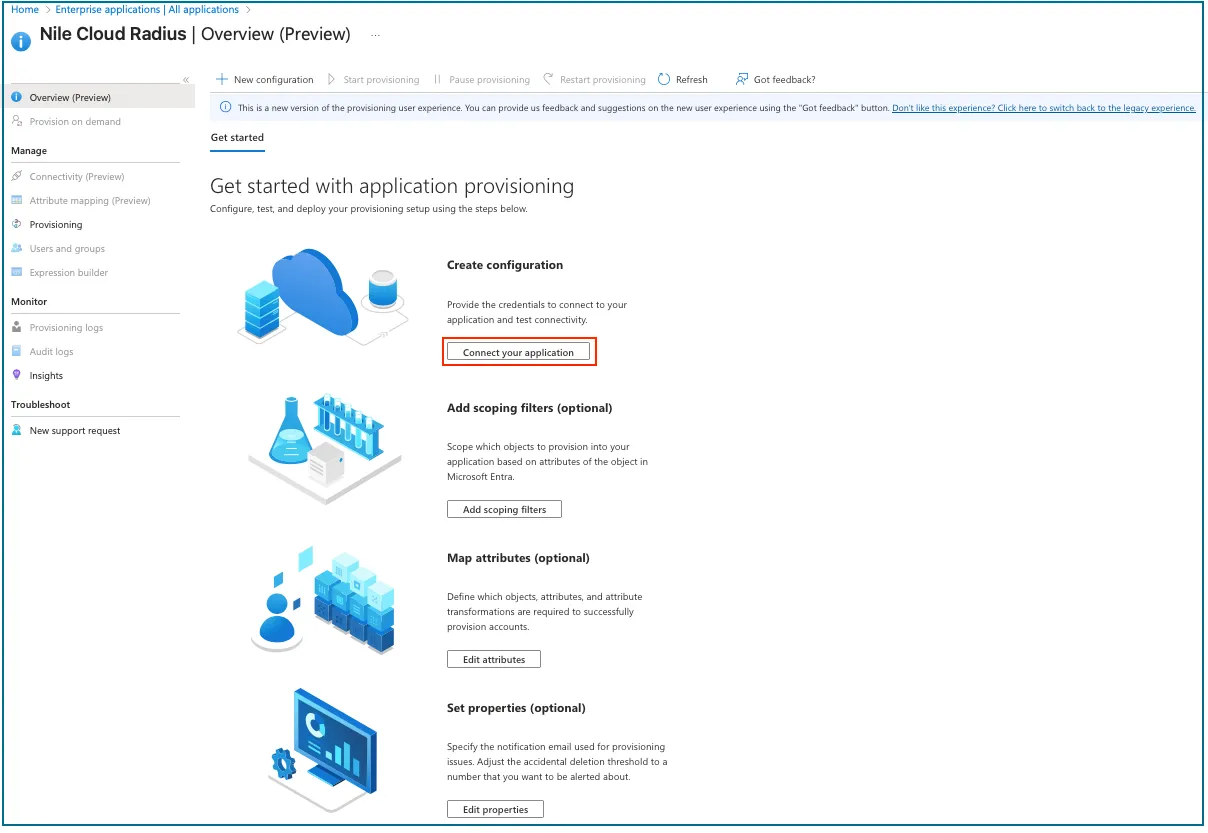
- Follow the new version of the Provisioning user experience and start by clicking the Connect your application button
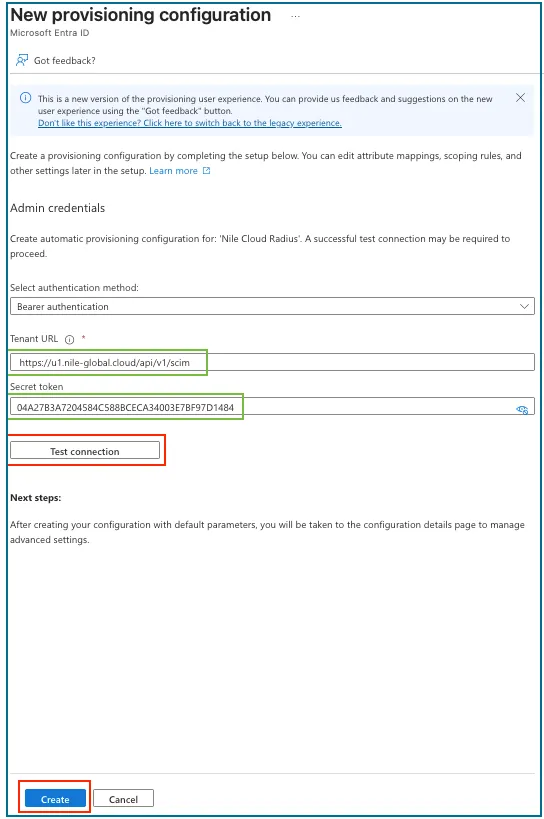
- Enter the SCIM URL and SCIM API key collected earlier from the Nile Control Center, then click the Test connection button for validation, before clicking on the Create button
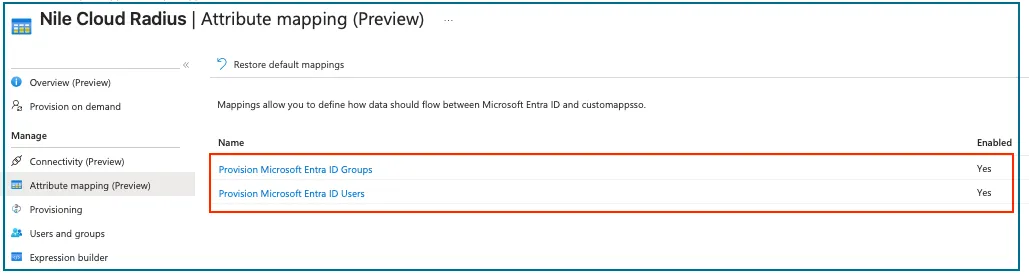
- Click the Overview (Preview) link at the top of the page and the Get started menu option to continue the Provisioning steps. Alternatively, the left pane menu options could also be leveraged to navigate through the provisioning options
- Click Add scoping filters to review and validate that Groups and Users provisioning are enabled
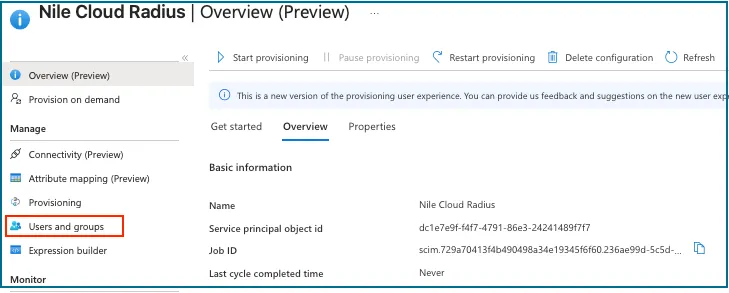
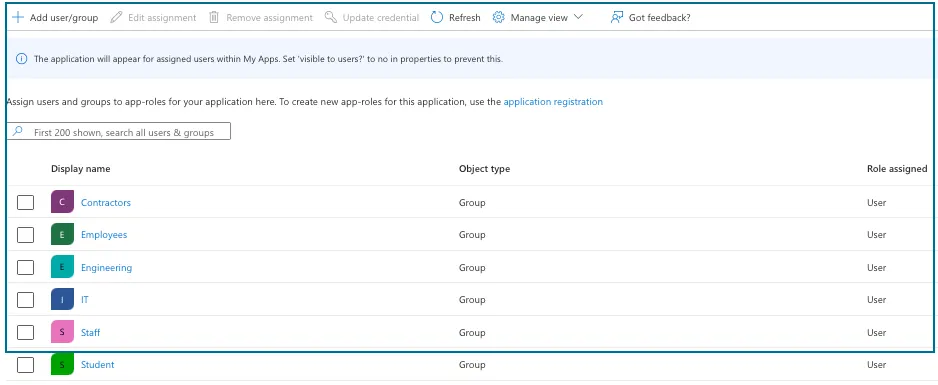
- Click the Users and groups option in the left pane menu to access the page where groups can be assigned
- Click +Add user/group to assign the desired groups, and click Assign to complete. An illustration is presented below
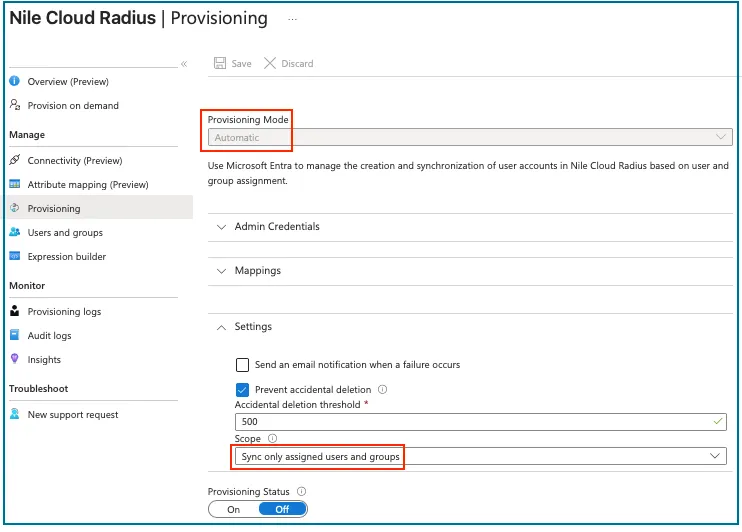
- Click the Provisioning option in the left pane menu and validate the following:
- Provisioning Mode is Automatic
- Under Settings, the Scope is to sync only assigned users and groups
- The last step is to start the provisioning by navigating to the Overview (Preview) page, and clicking Start provisioning, then clicking YES to the prompt
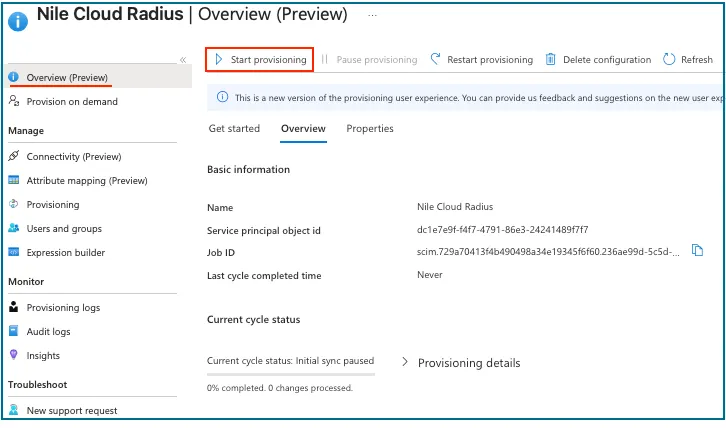
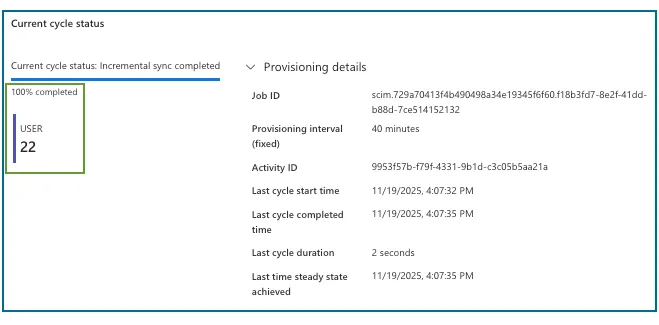
- The Current cycle status provides a provisioning update